PWM Module Case
This project is an example of designing and printing a case for a small
module (XY-LPWM). It introduces some innovations that are worth
considering for future projects.
Parts
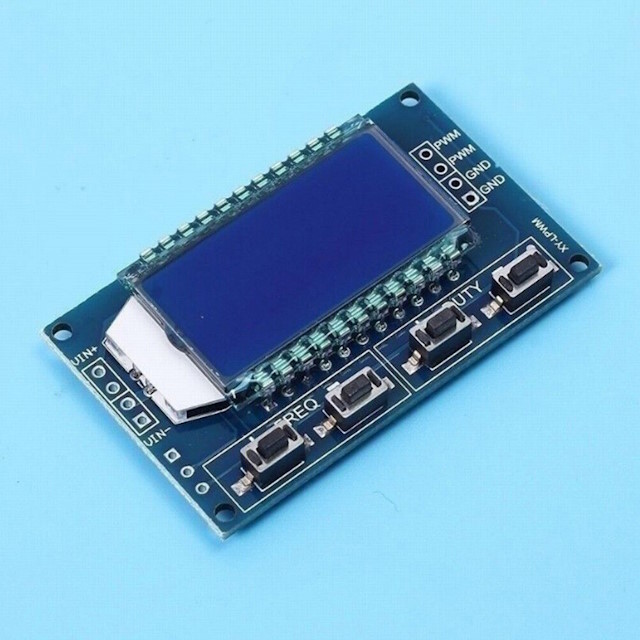 PWM
Generator Module. This is a small device available from a
number of sources that generates a user-defined PWM output from an input
voltage of 3.3V to 30V. The duty cycle can be adjusted from 0 to 100%, and
the frequency from 1Hz to 150KHz.
The module can be used as a signal generator for testing purposes and is
particularly suitable for testing servos and DC motors. It can also be
used with a LED module at a duty cycle settig of 1% to make a very useful
stroboscope. Note that the output is not a high-current driver - a
servo will require a separate power supply, and a motor will require a
driver board.
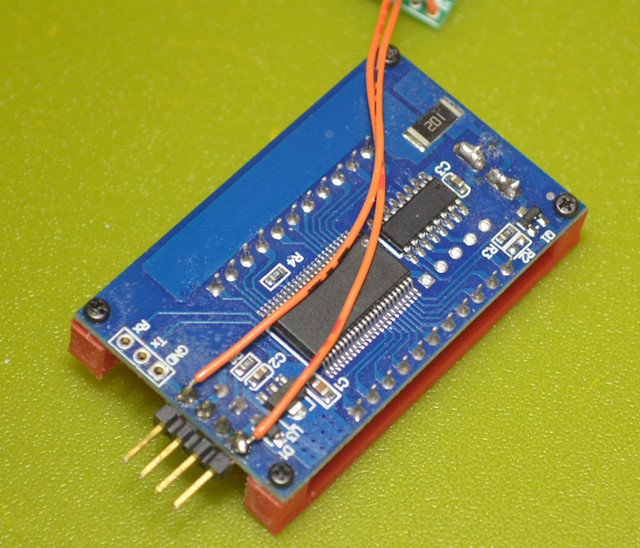
The board has a custom display panel mounted on the front, with the
components on the rear. Through-holes are provided for supply
voltage at the left and PWM signal output at the right, in both cases
doubled up. There are also holes for a serial interface on the left
- they are not used in this example, but space for the headers has been
allowed.
Beneath the display is a row of four buttons for setting the PWM
parameters - duty cycle +/- and frequency +/-.
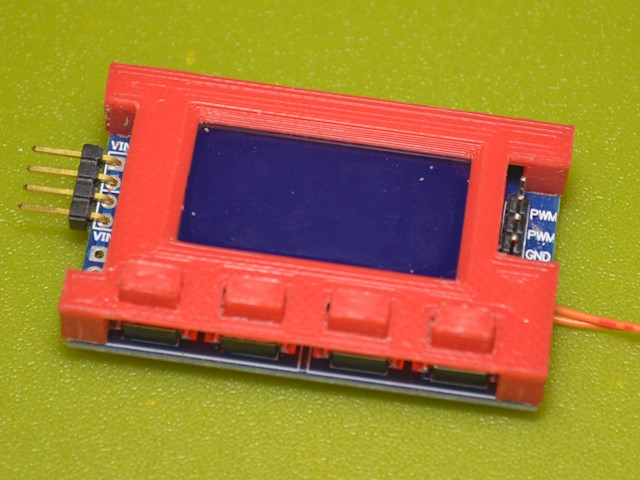
Headers for the PCB connections are at the user's choice - in this
example right-angle pin headers have been used tor the power input, and
straight pin headers for the output. The power input is
duplicated with wiring to a USB Micro connector in the bottom of the case.
Note: connecting both USB input and external power will probably damage
the USB device!
Construction
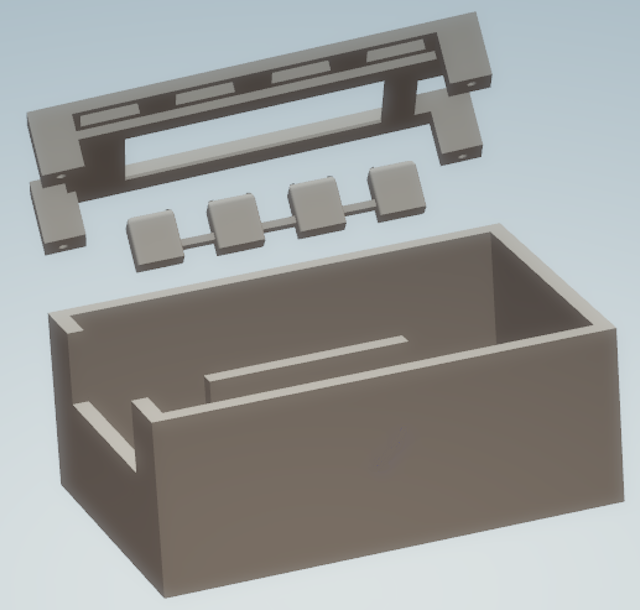 The
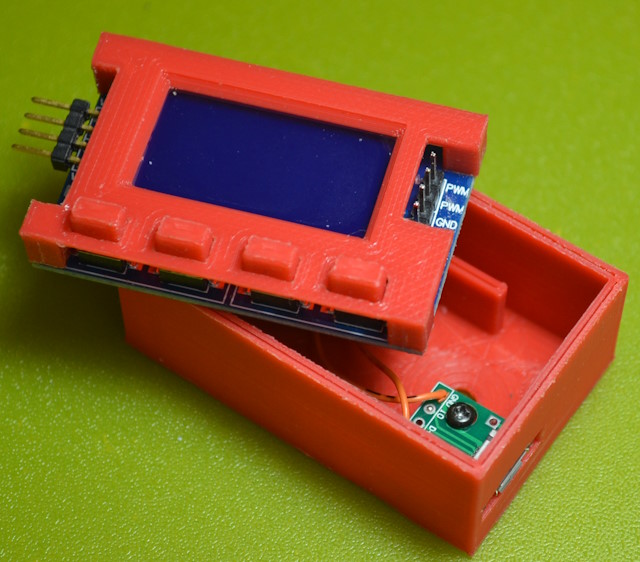
unusual aspect of this project is the recessed face plate. The PCB
is mounted to the back of the faceplate with screws from underneath. The
faceplate with module attached then drops inside the case to rest on
supports in the base. There are no screws to attach the faceplate
and module to the base.
Due to a small discrepancy in the measurement, the faceplate actually
sits slightly below the top edge of the case. This has not been
adjusted as it adds an interesting detail to the finished unit.
The advantage of designing the faceplate like this is that it is quick to
print. As the item has a number of features which must be precisely
dimensioned it is likely that several prototypes will be needed, so
keeping it small means that doing another print is quick and easy.
The bulk of the printing time is in the base, which has simpler
dimensions.
The buttons are implemented as a strip of four in a single piece. The
joining piece is thick enough to print properly, but is flexible enough so
that one button can be pressed without disturbing the others. This
is achieved by ensuring that the buttons fit neatly between the back of
the faceplate and the top of the switch. The connecting strip for the
buttons butts against the back of the face plate, and keeps the buttons
pushed against the switches. With no gap between the bottom of the
buttons and the top of the switches, flexing of the strip is kept to a
minimum. This arrangement also stabilizes the whole button
row. Setting the buttons up like this means that the face-plate
needs to be no thicker than is required to support the module.
No attempt has been made to set the display flush with the faceplate.
With a flush display it is very difficult to make the surrounding edge
look good, and in any case the very small difference in height between the
face of the display and its mounting plate means that either the faceplate
would have to be very thin, or shallow cutouts would have to be provided
at strategic places on the rear. Instead, the surface of the display is
flush with the rear of the faceplate and the surround is chamfered to
provide the appearance of an escutcheon.
A cutout in the faceplate gives access to the output header, and a cutout
in the faceplate and the adjacent area of the base provides access to the
power pins.
A Micro USB socket is screwed to a pad in the base and a cutout in the
side provides the access. The position was dictated by the clearance
available on the underside of the module. The socket could have been
placed anywhere in the base if the design was made taller, but considering
that allowance needed to be made for the screws to mount the socket, it
was determined that the height should be minimized by locating the socket
where the best clearance was available.
Assembly

Model
The STL files for the model are available for download. They can all be printed without supports,
and the material doesn't matter.

 PWM
Generator Module. This is a small device available from a
number of sources that generates a user-defined PWM output from an input
voltage of 3.3V to 30V. The duty cycle can be adjusted from 0 to 100%, and
the frequency from 1Hz to 150KHz.
 The
unusual aspect of this project is the recessed face plate. The PCB
is mounted to the back of the faceplate with screws from underneath. The
faceplate with module attached then drops inside the case to rest on
supports in the base. There are no screws to attach the faceplate
and module to the base.


