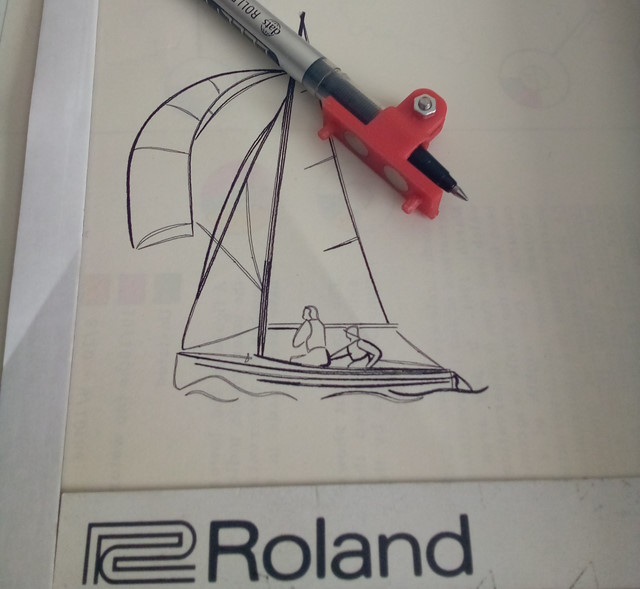
Roland Plotter
The objective of the project was to upgrade a Roland DXY-100 pen plotter.
The specific changes were:
- Replace the controller
- Upgrade the control language to gcode
- Maximize the plotting area
- Add limit switches
 The DXY-100
was one of the earliest Roland plotters, released in 1982. It was the
smallest of a series of plotters from Roland, leading up to the current
range of vinyl cutters, based on much the same technology. Large format
plotters were eventually replaced by laser printers, and it is difficult to
find a large format plotter today. So old ones are worth re-purposing.
The DXY-100
was one of the earliest Roland plotters, released in 1982. It was the
smallest of a series of plotters from Roland, leading up to the current
range of vinyl cutters, based on much the same technology. Large format
plotters were eventually replaced by laser printers, and it is difficult to
find a large format plotter today. So old ones are worth re-purposing.
The plotter is constructed with a top rail for the x-axis carriage. The
x-axis motor drives the whole of the x-axis carriage left and right with a
simple loop around a pulley at the opposite end of the rail. A rail
mounted vertically on the x-axis carriage holds the y carriage with the
pen holder. The y-axis motor is mounted on the frame at the other
end of the x-axis rail. It uses a wire loop through a complex series
of pulleys to drive the y-axis car up and down while maintaining the same
vertical position for any location of the x-axis carriage. A solenoid at
the top of the x-axis assembly moves the pen holder up and down using the
tension in a wire strung from the solenoid to the lower end of the y-axis
arm via a lever that moves the pen holder.
The power supply and controller are housed in a separate module that fits
below the top rail to the right of the plotting surface. This separate
box was probably designed so that the plotter could be stood up at an angle
against a frame. This feature means that it is easy to simply replace the
whole controller box with a new one.
The mechanics of the plotter were quite acceptable, providing good
resolution and repeatability, a nice pen holder and a good size plotting
surface. But it was completely out of date.
The controller actually stopped working at the start of the upgrade, The
original purpose of the upgrade was to replace the controller language, but
with the controller not functioning the replacement of the whole controller
became the primary objective.
The original plotter language was Roland-specific and there were almost
no utilities available that supported it. There was a single font, and it
looked quite strange. The available plotting commands were quite
limited. It might have been possible to create a translator
from one of the more common languages, but it would have been a lot of
work, and many of the primitive shape commands would have to be created
from scratch. The interface was a standard parallel port, and
these were become less available on newer PCs. But the controller
had died, so the original controller facilities had become irrelevant.
The original design did not use the whole of the platen area, so an
upgrade could be tweaked to get a worthwhile improvement in the maximum
plot size.The final result was 350mm x 245mm - about mid way between A4
and A3.
The original design required the operator to manually zero the plotter
before powering on. This was a nuisance to remember to do, but it
also meant there was no means of implementing a 'home' command which would
reset the plotting position if an error occurred. Limit switches
were required in order to remove the need for manual intervention.
The controller had been housed in a separate box that included the power
supply and a set of buttons for manual control. This meant that there was a
short connection leading from the plotter base to the controller box, so
replacing the whole box with a new one meant that wiring changes were
minimal. The manual control buttons were not implemented.
Controller
 The
replacement controller is an Arduino
UNO with a CNC
shield and two A4988
stepper driver modules installed. The controller runs GRBL configured for a
two-dimensional device (laser etching machine, or plotter). Everything is
installed in a generic prototyping case with custom-printed front and rear
panels. Power is from an old IBM laptop PC power supply, at 18v
nominal. The original motors were driven at 12v, but run quite happily at
the higher voltage. After some experimenting the current draw was
set at 800mA - no information was available about the existing motors, so
this was arrived at by noting the temperature rise under different
conditions. A linear regulator on a piece of perfboard drops the 18v
to 9v for the Arduino.
The
replacement controller is an Arduino
UNO with a CNC
shield and two A4988
stepper driver modules installed. The controller runs GRBL configured for a
two-dimensional device (laser etching machine, or plotter). Everything is
installed in a generic prototyping case with custom-printed front and rear
panels. Power is from an old IBM laptop PC power supply, at 18v
nominal. The original motors were driven at 12v, but run quite happily at
the higher voltage. After some experimenting the current draw was
set at 800mA - no information was available about the existing motors, so
this was arrived at by noting the temperature rise under different
conditions. A linear regulator on a piece of perfboard drops the 18v
to 9v for the Arduino.
Limit Switches
 Limit
switches were added for the two axes. The x-axis limit switch was
straightforward, mounted on the frame at the end of the x-axis rail. The
y-axis limit switch was more difficult, as it had to be mounted on the
y-axis arm which moves horizontally. A miniature limit switch
was screwed in to the arm at the end of the car movement, and the wires
led out the end of the arm and back up to the top of the arm, where they
joined the pen solenoid wiring in a rolling half-loop that eventually got
back to the controller. The limit switches were SPST NO so shielded
cable was used to connect them to the controller.
Limit
switches were added for the two axes. The x-axis limit switch was
straightforward, mounted on the frame at the end of the x-axis rail. The
y-axis limit switch was more difficult, as it had to be mounted on the
y-axis arm which moves horizontally. A miniature limit switch
was screwed in to the arm at the end of the car movement, and the wires
led out the end of the arm and back up to the top of the arm, where they
joined the pen solenoid wiring in a rolling half-loop that eventually got
back to the controller. The limit switches were SPST NO so shielded
cable was used to connect them to the controller.
Note that GRBL configuration is quite flexible about the axis layouts,
and a zero at top left is possible. In this case the installation of
the Y-axis end stop would be at the top of the moving arm, which would be
somewhat simpler to implement.
The original multi-pin connector to the controller was used. Because
the CNC controller used a 4-wire connection to the motors, instead of the
original 6 wires, there were spares available for running the limit switch
signals. Unfortunately it proved impossible to remove the pins from
the motor side of the connector housing, so the new wires had to be soldered
to flying leads instead of the neater solution of crimping to new
pins.
Pen Solenoid
 A
diode was added across the solenoid leads where they attach to the frame
to replace the diode that was part of the original controller. A
pair of 5w resistors drop the voltage for the pen solenoid - the
preferable option would be to replace the solenoid with a higher-rated
version, but the mount is unusual so a replacement is difficult to find.
A
diode was added across the solenoid leads where they attach to the frame
to replace the diode that was part of the original controller. A
pair of 5w resistors drop the voltage for the pen solenoid - the
preferable option would be to replace the solenoid with a higher-rated
version, but the mount is unusual so a replacement is difficult to find.
Pen Holder
The pen holder provided with the machine is only suitable for a very thin
pen, which is difficult to find. In order to enable usage of more
commonly available pens new holders were created. The holder is attached
with a pair of small neodymium magnets. The two magnetic strips for
holding the drawing sheet were supplemented with new strips (as used for
magnetic pinboards) covered with self-sticking vinyl.
Panels
 The
Arduino USB connector is exposed at the front panel for connection to the
PC. The power input socket is also exposed at the front panel, but is not
used. (The only additional drain on the Arduino 5V is the logic supply for
the two driver modules, and some smoothing capacitors on the CNC board).
A small LED shows the power-on state, and there are 3 NO momentary
buttons for Hold, Resume and E_STOP. The mains power supply is via an IEC
socket in the rear of the mains adapter that fits in a cutout in the back
panel.
The
Arduino USB connector is exposed at the front panel for connection to the
PC. The power input socket is also exposed at the front panel, but is not
used. (The only additional drain on the Arduino 5V is the logic supply for
the two driver modules, and some smoothing capacitors on the CNC board).
A small LED shows the power-on state, and there are 3 NO momentary
buttons for Hold, Resume and E_STOP. The mains power supply is via an IEC
socket in the rear of the mains adapter that fits in a cutout in the back
panel.
Software
Pen control was implemented using the Spindle Enable connection of the
CNC shield, so 'M3' means pen down and 'M5' means pen up. Note that
this is controlled by Arduino pin 12, and will be labelled Z+ Limit Sw (or
Z- Limit Sw - same thing) depending on your version of the CNC shield.
The most suitable utility for preparing images, creating GCode and
sending to the plotter appears to be DeskProto. It requires a custom device
definition and a custom post-processor to properly handle the
plotter. This is easily done with a few small changes to any
suitable similar plotter and postprocessor selected from the very
extensive examples provided with the application, and once setup becomes
the default for new projects. The utility used for Creality printers in
laser mode is also very useful, especially for converting bitmap images -
see CrealityWorkshop-en-2019-9-16.exe
- Google Drive. LaserGRBL is also worth looking at.
Implementing GRBL required a lot of testing and adjustments. The
final setting for the GRBL parameters are:
| Settings
and sample values |
Description |
| $0=10 |
Step
pulse, microseconds |
| $1=10 |
Step
idle delay, milliseconds |
| $2=0 |
Step
port invert, mask |
| $3=0 |
Direction
port invert, mask |
| $4=0 |
Step
enable invert, boolean |
| $5=0 |
Limit
pins invert, boolean |
| $6=0 |
Probe
pin invert, boolean |
| $10=11 |
Status
report, mask |
| $11=0.010 |
Junction
deviation, mm |
| $12=0.002 |
Arc
tolerance, mm |
| $13=0 |
Report
inches, boolean |
| $20=1 |
Soft
limits, boolean |
| $21=1 |
Hard
limits, boolean |
| $22=1 |
Homing
cycle, boolean |
| $23=3 |
Homing
dir invert, mask |
| $24=12.000 |
Homing
feed, mm/min |
| $25=2000.000 |
Homing
seek, mm/min |
| $26=250 |
Homing
debounce, milliseconds |
| $27=2.000 |
Homing
pull-off, mm |
| $30=0 |
Max
spindle speed, RPM |
| $31=0 |
Min
spindle speed, RPM |
| $32=1 |
Laser
mode, boolean |
| $100=20.100 |
X
steps/mm |
| $101=20.000 |
Y
steps/mm |
| $102=10.000 |
Z
steps/mm |
| $110=3000.000 |
X
Max rate, mm/min |
| $111=3000.000 |
Y
Max rate, mm/min |
| $112=500.000 |
Z
Max rate, mm/min |
| $120=30.000 |
X
Acceleration, mm/sec^2 |
| $121=30.000 |
Y
Acceleration, mm/sec^2 |
| $122=10.000 |
Z
Acceleration, mm/sec^2 |
| $130=350.000 |
X
Max travel, mm |
| $131=245.000 |
Y
Max travel, mm |
| $132=200.000 |
Z
Max travel, mm |
Note that there are additional settings in the code that are required for
any particular setup. Some of the above settings are dependent on the
hardware. For instance, the 'home' parameters needed quite a bit of
juggling to correctly match the particular limit switches that were used.
Note also the homing direction mask: this is set for limit switches at the
bottom left of the platen. If I was doing it again I would
probably do them at top right. This would simplify the installation of the
Y-axis limit switch and make the home position consistent with most CNC
machines.
