Labelling
Good labeling is important in creating a finished, professional
appearance for a project. There are many options with different
levels of difficulty and different standards of finish. In this
article a few of those options will be explored.
3D printing
 Adding
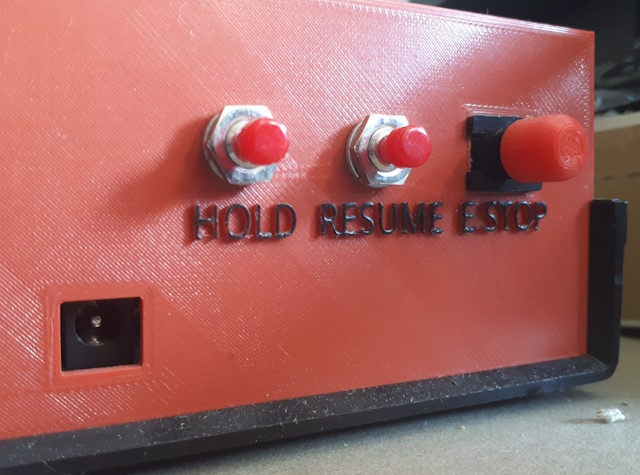
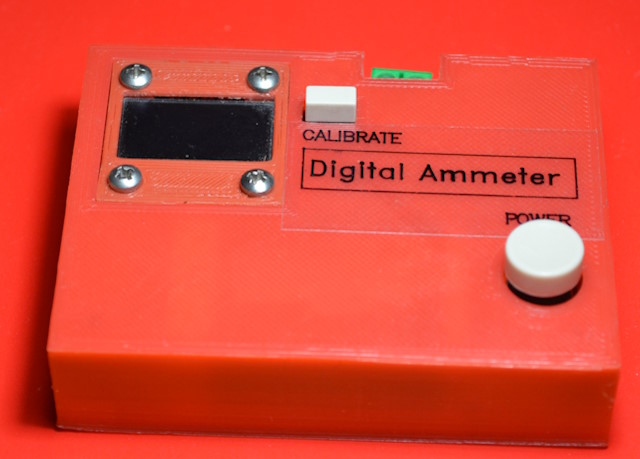
text to the surface of a 3D print is relatively easy (depending on the
CAD/CAM software) and is very suitable for some projects.
Generally, the label has to use large lettering in order to print
correctly, and that means it is only suitable for small amounts of text,
such as "On-Off" or "+5V". As the labels are created using CAD
any text and graphic is available.
When labels are created standing out from the surface they can be
highlighted by painting the raised surface; when they are created as
indents there are techniques for masking the surface and painting the
indent. However the usual technique of covering the area ans
scraping away the surface will not work well with 3D printing, becasue the
surface to be cleared is textured and retains the paint.
One problem with this approach can occur where labels are printed on the
top of the case. The part is usually printed with with the top on
the baseplate in order to minimize supports and infill. If labels
are printed as raised text then the surface on the base is no longer flat,
and if printed as an indent then it is hard to get a sharp edge on the
bottom layer, due to 'elephant's foot'. A face that is a single
sheet overcomes this problem. A single sheet can be inserted into slots in
a base frame, or can be dropped onto supports on internal walls as a lid.
Dual-filament 3D printers can be set up to include a label of a different
colour embedded into a flat surface. Results are variable, depending
on the printer and the filament used.
Printed labels

Plotters and printers can share the same print material. This
can be any style of printer paper, from plain bond to high gloss photo
paper. If plain bond is used it should be finished with a clear
coating. High-gloss photo paper is very suitable for labels, and is
available either as plain sheets (often in 10x8cm photo format) or as
self-adhesive A4 sheets. When used with a plotter some testing for
the most suitable type of pen is worthwhile, as some inks will take a long
time to dry and some might never dry properly.
A wide variety of printing material is available for both printers and
plotters, ranging from standard bond to light card, various types of gloss
or photo-quality paper, self adhesive media, and special material such as
transparent film. Care must be taken to ensure anything other than
bond is compatible with a laser printer, and self-adhesive or high-gloss
media might not be available for some lasers.
Inkjet and laser printers are inexpensive and readily available, but ink
or toner may be expensive. Graphics and text is limited only by the
capability of the application that creates the image. Resolution is
good.
Plotters are more expensive, unless they are home-made such as a
conversion of a 3D printer or CNC machine. The advantage of using a
plotter is that the pens are cheap and different pens can be used for
different effects, such as very glossy high-build. Resolution
depends on the pens that are used, and plotters do not handle solid areas
well. It is difficult (or expensive) to use more than one colour in
a label, but plotters tend to use less material because it is possible to
cut out any size label and use the rest of the sheet next time, whereas
printers often require a standard size sheet. Examples shown here were
created with a plotter. Preparation of images to print is slightly
more complicated with a plotter because everything must be reduced to a
line drawing. Printing material is limited only be the availability
of compatible pens.
A tip for printing small labels with special paper with printers:
It is not necessary print the whole page for a small label using quality
paper. The label can be positioned in the centre of a page, and a sample
printed on plain paper, Then a small piece of the special paper (eg, high
gloss or self-sticking label) can be carefully taped to the centre of the
plain sheet, using the sample print to guide placement, and the label
printed again.

Desktop label printer

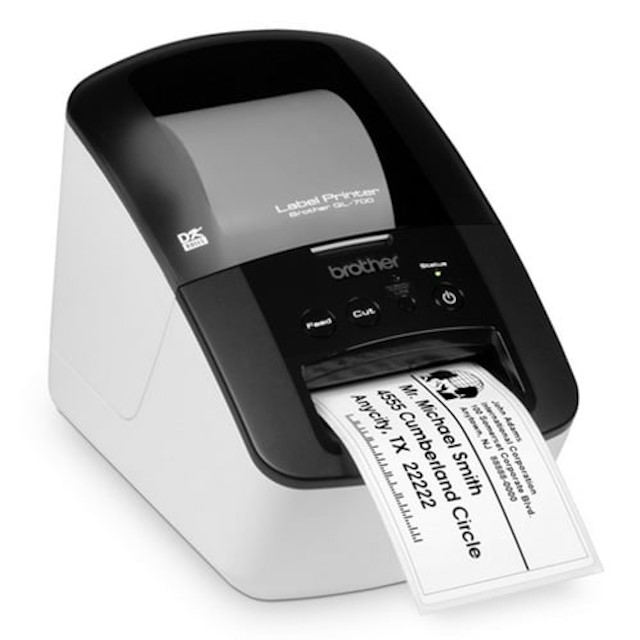
Dedicated desktop label printers are available, but they are expensive
and often the choice of print material is limited. They are mainly
designed for high volume applications, and sometime use a proprietary
protocol that may restrict text and graphics options.
Hand-held Tape Labeller
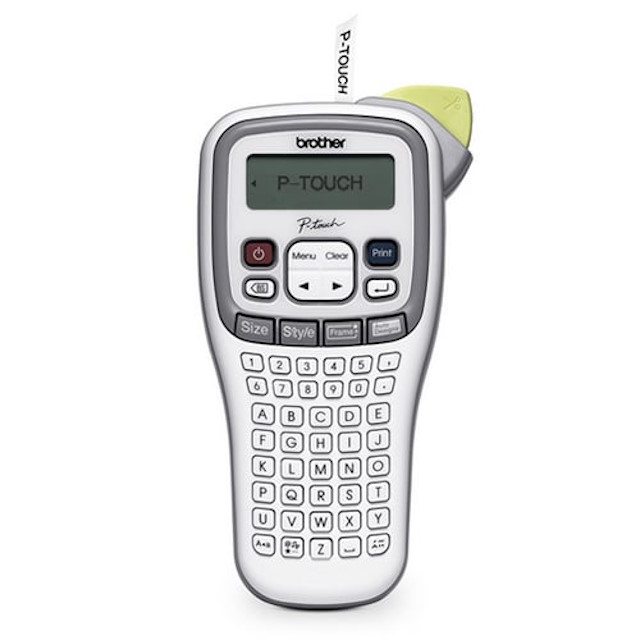
 Hand-held tape label printers are available and some are quite
inexpensive. They typically use a temperature sensitive plastic tape
which is available in a variety of different base colours (including
transparent), and a similar range of print colours. As the colour is
determined by the tape only one colour can be used for any one
label. There will be a limited number of font styles and sizes
available, and graphics will only be available as icons. In some
cases custom icons can be loaded into the labeller.
The hand-held labellers are very easy to use, but quite hard on batteries
- an adapter is recommended. The manufacturer's recommended adapter
can cost several times the price of the labeller: a generic adapter is
much cheaper, but it must have the correct specifications (including plug
polarity) and sometimes the details can be hard to find. For
occasional use rechargeable batteries are suitable.
Tapes are available from many sources and prices are reasonable.
The printing is clear and sharp and resists chemicals and abrasion
well. The glue used for the tape is usually very effective. Tape
labellers are very useful for creating labels for wrapping around cables -
something that the other forms of labellers cannot do easily.
Hint: Some hand-held label printers are available at bargain
prices. The reason may be that users quickly discover that usage
with batteries is impractical and will purchase the power adapter, which
costs many time the price of the labeller and is where the manufacturer
makes their profit. The trick is to use a third-party generic
adapter, but be very careful about voltage, current capability, and
polarity at the connector. Labeller manufacturers tend to keep this
information very secret, but it is available. Polarity at the
connector may need to be discovered by investigating the internals of the
device, because it appears common to make it the opposite to virtually
every other device that could use the adapter.

 Adding
text to the surface of a 3D print is relatively easy (depending on the
CAD/CAM software) and is very suitable for some projects.
Generally, the label has to use large lettering in order to print
correctly, and that means it is only suitable for small amounts of text,
such as "On-Off" or "+5V". As the labels are created using CAD
any text and graphic is available.
 Hand-held tape label printers are available and some are quite
inexpensive. They typically use a temperature sensitive plastic tape
which is available in a variety of different base colours (including
transparent), and a similar range of print colours. As the colour is
determined by the tape only one colour can be used for any one
label. There will be a limited number of font styles and sizes
available, and graphics will only be available as icons. In some
cases custom icons can be loaded into the labeller.