DC Motor drivers require a dual voltage supply - one voltage for the motor and 5v for the logic. When driven from an Arduino or similar that device will also require 5v. Some modules, such as L298N, provide a 5v regulator on-board, but using this regulator means that the motor voltage is limited to 12v, as this is the maximum that the regulator can handle. Other modules, such as those based on a drv8832 or MX1508 (with a much lower maximum motor voltage) generate their logic supply internally, and it is not available for other devices, such as the MCU controller.
Possible sources for the 5v include the on-board regulator in the module (for the L298N and similar), the Arduino USB supply, or the on-board regulator in the Arduino. But the regulator on the Arduino (like the same device in the driver module) is limited to a 12v maximum input, and the Arduino might be operated without a USB connection. In this case the 5v has to be sourced from a separate supply, or from the motor supply.
The L298N chip used in the LM298N module, as well as other similar DC motor drivers, can handle motor drive voltages of up to about 45V. The 78xx series of regulators can handle a similar voltage if they have adequate heatsinking, so a motor supply voltage of between 7v and 40v is suitable as a source for the 5v logic supply required by the Arduino and the driver module.
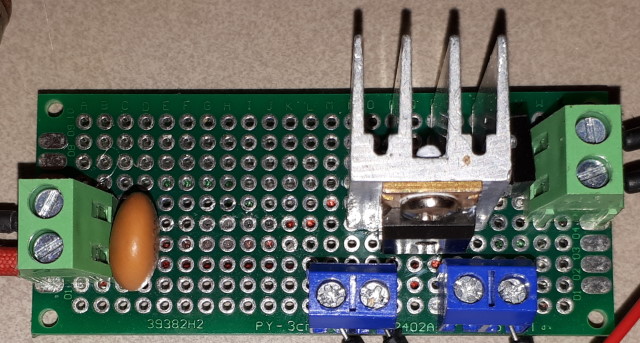
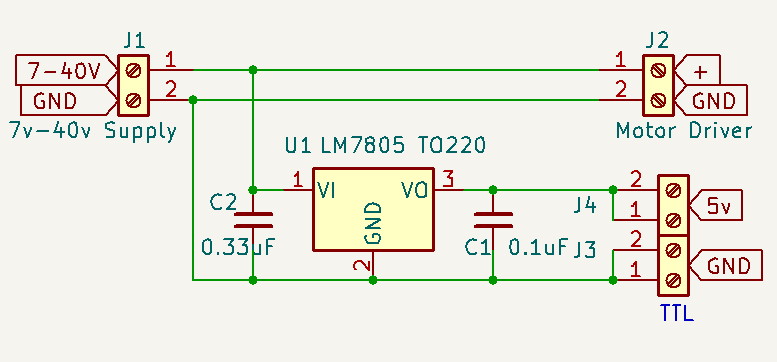
This project is a small adapter board that connects to a supply of between 7v and 40v, passes that voltage straight through, and also generates 5v at up to 1A for logic. Screw terminals are provided for the DC source (7-40v and ground), driver supply, MCU power (5v and ground) and driver module logic (5v and ground).
The adapter is useful in any project that requires both a high voltage supply and a 5V supp0ly, such as a NeoPixel display.
Note that they larger style of L298N driver modules include an option for using the on-board regulator as the 5v source. When operated from this adapter the driver module regulator must be disconnected from the motor supply ('PWR' jumper on the LM298N). The smaller style modules based around the MX1508 do not have the option, but may not cope with more than about 10V motor supply, as they generate the logic supply on board using a very small regulator.
Prototyping board
7805 5v regulator, TO-220
Heatsink to suit TO-220
2 x 2-pin screw connectors (large)
2 x 2-pin screw connectors (small)
1 x .01uF capacitor
1 x 0.33uF capacitor (Optional)

The 0.33uF capacitor is optional - if the supply power is not subject to excessive ripple or spikes then it can be omitted. If there is excessive ripple or spikes a larger value capacitor might be required.

All wiring is on the underside using tinned copper wire covered with woven fibre sleeve for maximum insulation. A prototype board has been chosen which allows for a 3.3v regulator and heatsink to be added, if required. Also, space has been allowed between the 5v terminals and the Ground terminals for a LED to be added when the case is designed and printed.
Several additions are possible:
1. If the power supply requires a minimum load in order to provide proper regulation, and the module will not always have a load attached, then a suitable resistor can be added across the supply terminals..
2. If the MCU or other modules require 3.3V then a suitable regulator can be added in parallel with the 7805. This may affect the maximum supply voltage that can be used. If this is a problem then the 3.3v regulator can be driven from the 5v supply.
3. If the adapter is used to drive the motor directly (without a driver module) then a diode should be added across the output to protect from back-EMF. Note that a driver module does not normally require this protection because the motor is put into braking mode which disables the high-side MOSFETs.
4. A LED with resistor can be wired across the 5v output as a power indicator.

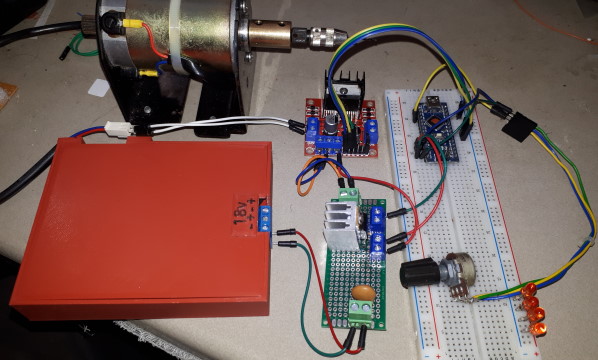
The example usage case is an Arduino Nano and a 18v supply to a DC motor, with a potentiometer on analog pin 0 for speed control through the Arduino pin 10 and the PWM input of the LM298N module.
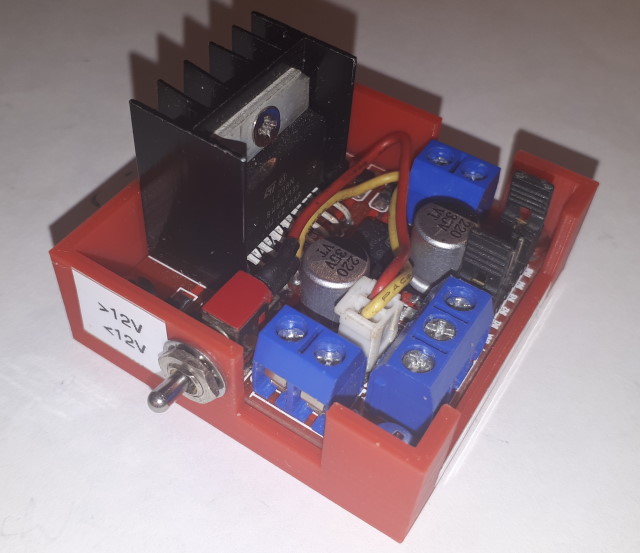
As noted above, when the L298N controller is used with a supply greater than ~12V the power jumper must be removed, or the regulator may be damaged. Remembering whether the jumper should be installed or removed is a nuisance. The addition of a switch, as demonstrated below, as part of the case created for the controller, makes switching between supplies of less than or greater than 12V much more convenient, and safer for the regulator.

This page last updated 18 August 2024
